Air Fryer vs Oven: Cooking Time Conversion Guide
Convert any oven recipe to air fryer with our simple formula. Complete time and temperature conversion chart for popular foods.
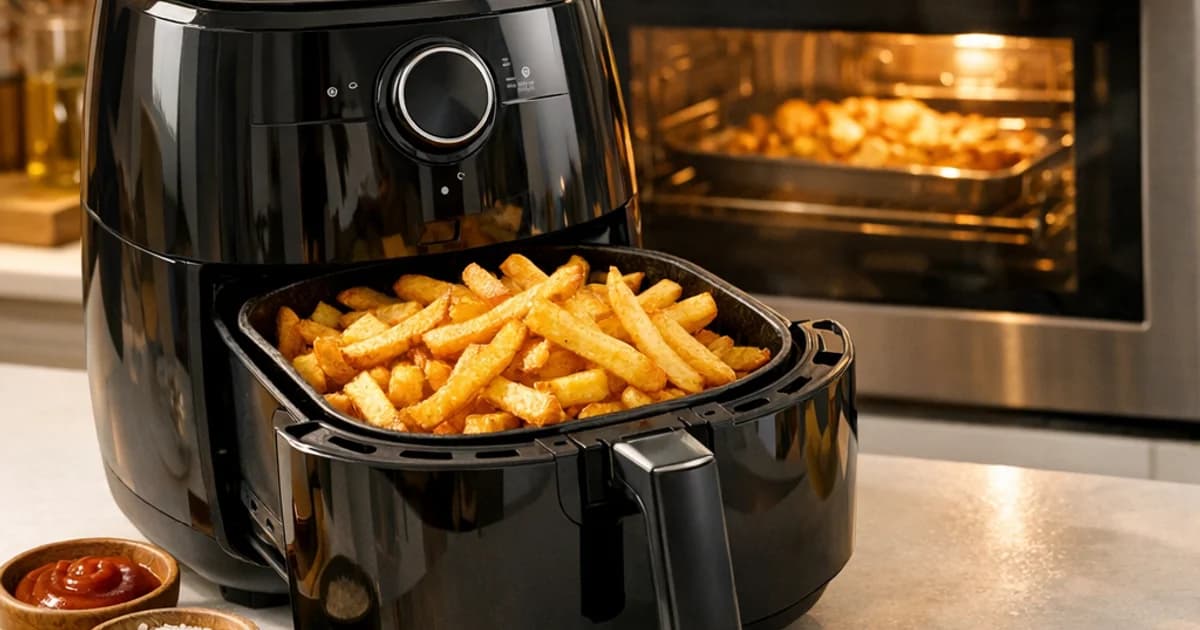
The air fryer has earned its place in millions of kitchens for good reason: it delivers crispy, browned results faster than a conventional oven and without heating up the whole room. But there is one problem nearly every air fryer owner runs into — most recipes are still written for conventional ovens. You pull up a chicken recipe, it says 400°F for 35 minutes, and you are left guessing what to punch into your air fryer.
The conversion is not complicated once you understand what is actually happening inside the machine. An air fryer is essentially a compact convection oven. It circulates hot air at high speed around the food, which strips moisture away quickly and browns the surface faster than radiant oven heat. That speed and efficiency is exactly why cooking times and temperatures need to change — and why you cannot just throw any recipe straight in without adjusting.
This guide gives you a practical conversion formula, a full chart for the most common foods, and the situations where an air fryer will let you down no matter what adjustments you make.
Free Tool
Cooking Time Converter
Convert cooking times between oven, air fryer, slow cooker, and more with our free tool.
The Basic Conversion Rule
The standard conversion formula for moving an oven recipe to an air fryer is straightforward:
- Reduce the temperature by 25°F (about 15°C)
- Reduce the cooking time by approximately 20%
So if an oven recipe calls for 400°F for 25 minutes, you would set your air fryer to 375°F and start checking around the 20-minute mark.
Why does this work? Because the forced air circulation in an air fryer transfers heat to food much more efficiently than the still or lightly circulated air in a conventional oven. The food is never more than a few inches from the heating element, and the constant air movement means every surface gets exposed to heat continuously. The result is cooking that finishes faster and at a lower temperature setting.
A few things to keep in mind about this formula:
It is a starting point, not a guarantee. Air fryer models vary considerably. A 5-quart basket model from one brand may cook noticeably hotter than a 6-quart drawer model from another. The first time you cook any recipe in your air fryer, check early and note the actual time it took. Over a few weeks you will develop a feel for how your specific machine behaves.
Dense foods need more adjustment than thin ones. A thin chicken cutlet will follow the 20% reduction fairly closely. A thick pork tenderloin or large chicken breast may need only a 10-15% time reduction because the interior still needs time to come to temperature regardless of how fast the outside is cooking.
Smaller portions cook faster than larger ones. An air fryer basket holds less food than a full sheet pan, and the food is closer together. When you scale down a recipe for two people versus four, the cooking time may shorten slightly more than the 20% rule suggests.
Air Fryer vs Oven: Complete Conversion Chart
The table below covers the most common foods people cook in an air fryer. Oven temperatures assume a standard (non-convection) oven. Air fryer times assume food is added to a preheated basket.
| Food | Oven Temp | Oven Time | Air Fryer Temp | Air Fryer Time | Notes |
|---|---|---|---|---|---|
| Chicken breast (boneless, 6 oz) | 400°F / 200°C | 22–25 min | 375°F / 190°C | 16–18 min | Flip halfway |
| Chicken thighs (bone-in) | 425°F / 220°C | 35–40 min | 400°F / 200°C | 25–28 min | Flip halfway |
| Chicken wings | 425°F / 220°C | 40–45 min | 400°F / 200°C | 22–25 min | Shake twice |
| Salmon fillet (1 inch thick) | 400°F / 200°C | 12–15 min | 375°F / 190°C | 8–10 min | No flipping needed |
| Shrimp (large, peeled) | 400°F / 200°C | 8–10 min | 375°F / 190°C | 5–6 min | Single layer only |
| Pork chops (3/4 inch thick) | 400°F / 200°C | 20–22 min | 375°F / 190°C | 12–14 min | Flip halfway |
| Steak (1 inch, medium-rare) | 450°F / 230°C | 10–12 min | 400°F / 200°C | 8–10 min | Rest 5 min after |
| French fries (frozen) | 425°F / 220°C | 25–30 min | 400°F / 200°C | 15–18 min | Shake every 5 min |
| French fries (homemade) | 425°F / 220°C | 30–35 min | 380°F / 195°C | 18–22 min | Pat dry before cooking |
| Broccoli florets | 400°F / 200°C | 18–20 min | 375°F / 190°C | 10–12 min | Toss in oil first |
| Brussels sprouts | 400°F / 200°C | 22–25 min | 375°F / 190°C | 13–15 min | Halve them |
| Asparagus | 400°F / 200°C | 12–15 min | 375°F / 190°C | 7–9 min | Single layer |
| Zucchini slices | 400°F / 200°C | 15–18 min | 375°F / 190°C | 8–10 min | Do not overcrowd |
| Frozen mozzarella sticks | 400°F / 200°C | 10–12 min | 375°F / 190°C | 6–8 min | Spray lightly with oil |
| Frozen spring rolls | 400°F / 200°C | 18–20 min | 375°F / 190°C | 10–12 min | Turn once |
| Bacon strips | 400°F / 200°C | 14–16 min | 375°F / 190°C | 8–10 min | Use parchment liner |
| Reheated pizza slice | 350°F / 175°C | 10–12 min | 325°F / 165°C | 4–5 min | Far better than microwave |
| Garlic bread | 375°F / 190°C | 10–12 min | 350°F / 175°C | 5–7 min | Watch closely |
| Tofu (extra firm, cubed) | 400°F / 200°C | 25–30 min | 375°F / 190°C | 15–18 min | Press dry before cooking |
| Chickpeas (roasted) | 400°F / 200°C | 30–35 min | 375°F / 190°C | 18–22 min | Toss in oil and spices |
Tip
The single most important rule for air fryer cooking is to avoid overcrowding the basket. Hot air needs to circulate freely around every piece of food to get the crispy result you are after. When food is piled on top of itself, the bottom pieces steam instead of roast. For large batches, cook in two or three rounds rather than cramming everything in at once. It takes longer overall but the quality difference is significant.
When NOT to Use an Air Fryer
The air fryer is genuinely versatile, but there are categories of food where it either cannot do the job properly or actively makes things worse.
Wet batters. Classic beer batter, tempura, and any coating that is liquid when raw will drip through the basket grate and make a mess — or simply fall off the food before it sets. The forced air also disrupts wet coatings before they have a chance to solidify. For properly battered fish or onion rings, a deep fryer or shallow pan of hot oil is still the right tool. Dry breadcrumb coatings work well in an air fryer; liquid batters do not.
Large roasts. A whole chicken over 4 lbs, a leg of lamb, or a large beef roast will not fit properly in most standard air fryer baskets. Even in larger models, the geometry of a basket or drawer means the meat sits too close to the heating element on one side. You end up with one surface overcooked before the interior is done. For large cuts, an oven with a proper roasting pan provides more even, controlled heat.
Delicate baked goods. Cakes, souffles, custards, and anything that needs gentle, consistent heat throughout will suffer in an air fryer. The aggressive air circulation can cause uneven rising, cracked tops, and exteriors that set before the inside is fully cooked. Quick breads and muffins can work in a pinch, but anything that requires careful temperature control is better left to the oven.
Large quantities. If you are cooking for six or more people, an air fryer will require you to work in multiple batches, which negates much of the time advantage. For big family meals or dinner parties, a conventional oven — or multiple sheet pans — is the more practical choice.
Pro Tips for Air Fryer Cooking
Preheat the basket. Most air fryers reach cooking temperature in 2–3 minutes. Preheating ensures that food starts cooking immediately on contact, which is especially important for foods you want crispy on the outside. Skipping preheat adds 2–4 minutes to your effective cook time and often produces a softer exterior.
Shake or flip at the halfway point. For anything in pieces — fries, wings, vegetables, chickpeas — shake the basket or use tongs to flip the food halfway through cooking. The side facing the heating element gets more direct heat. Flipping ensures even browning on all sides.
Use oil spray, not a pour. A light coating of oil is all most foods need in an air fryer. An oil spray bottle gives you even, thin coverage without drowning the food. Avoid aerosol sprays that contain propellants (like PAM), which can degrade non-stick coatings over time. A refillable pump sprayer with your preferred oil is the better long-term choice.
Use parchment liners for sticky or messy foods. Perforated parchment rounds designed for air fryers let air circulate while catching drips and preventing food from sticking. They are especially useful for bacon, saucy items, and delicate fish fillets. Never put parchment in without food on top of it — it will fly up to the heating element.
Pat food dry before cooking. Moisture is the enemy of crispiness. Before adding food to the basket, pat it dry with a paper towel. This is especially important for tofu, chicken, and vegetables with high water content. The less surface moisture, the faster the Maillard reaction that creates browning and crunch.
Do not be afraid to pull food early. Air fryers run hot and cook fast. It is worth checking food 3–4 minutes before the recipe suggests, especially the first time you cook something new. You can always add more time; you cannot undo overcooking.
Warning
Foods with high fat content — bacon, fatty sausages, duck legs, skin-on thighs with a lot of fat — can produce significant smoke at air fryer temperatures. The fat drips to the bottom of the drawer and burns. To reduce this, add a tablespoon of water to the bottom drawer before cooking fatty items. Check and empty accumulated fat partway through longer cook times. If your kitchen is filling with smoke, reduce the temperature by 25°F and increase the time slightly.
Slow Cooker and Instant Pot Conversions
The air fryer is not the only appliance that needs a different approach. Here is a quick reference for converting between other common cooking methods:
| Original Method | Time | Slow Cooker (Low) | Slow Cooker (High) | Instant Pot |
|---|---|---|---|---|
| Oven at 325°F | 1–2 hours | 6–8 hours | 3–4 hours | 25–35 min |
| Oven at 350°F | 1–2 hours | 6–8 hours | 3–4 hours | 20–30 min |
| Stovetop simmer | 1–2 hours | 6–8 hours | 3–4 hours | 20–25 min |
| Slow cooker (Low) | 6–8 hours | — | 3–4 hours | 20–30 min |
| Slow cooker (High) | 3–4 hours | 6–8 hours | — | 15–20 min |
Pressure cookers and Instant Pots reduce liquid-based dishes dramatically — stews, braises, soups, and bean dishes that take 2+ hours on the stovetop often finish in 20–30 minutes under pressure. The key difference from air frying is that pressure cooking works with liquid, while air frying works best with dry-heat methods.
How to Adapt Any Oven Recipe
Follow this process whenever you want to convert a recipe you have never made in an air fryer before:
Step 1: Identify the cooking method. Is the oven recipe roasting, baking, broiling, or something else? Roasting and broiling translate well to air fryers. Baking translates reasonably well for simple items. Braising and anything that needs a covered pot does not.
Step 2: Apply the base conversion. Subtract 25°F from the oven temperature. Multiply the oven time by 0.8 to get your starting air fryer time. Write both numbers down before you start cooking.
Step 3: Consider the thickness and density. Very thick cuts (over 1.5 inches) or dense items like a stuffed chicken breast may need only a 10–15% time reduction rather than 20%. Thin items like asparagus spears or shrimp may cook even faster — sometimes 25–30% less time.
Step 4: Check internal temperature, not just surface color. Air fryers brown food quickly, and a nicely browned exterior can mask an undercooked interior. Use an instant-read thermometer for any protein. This matters most for chicken (165°F / 74°C), pork (145°F / 63°C), and thick beef cuts.
Step 5: Note the result and adjust. After cooking, write down what you actually did: the temperature, the time, and the result. Was it done 2 minutes early? Was the outside browning faster than the inside was cooking through? These notes become your personal conversion guide for that dish.
Step 6: Build your reference list. After a few weeks of air frying, you will have a short list of your household's regular meals with exact times and temperatures dialed in for your specific machine. That list is more useful than any generic chart, including this one.
Key Takeaway
Reduce oven temperature by 25°F and cooking time by 20% as your starting conversion for any air fryer recipe. Always check internal temperatures for proteins rather than relying on color alone, and never overcrowd the basket — proper air circulation is what makes the air fryer faster and crispier than a conventional oven.
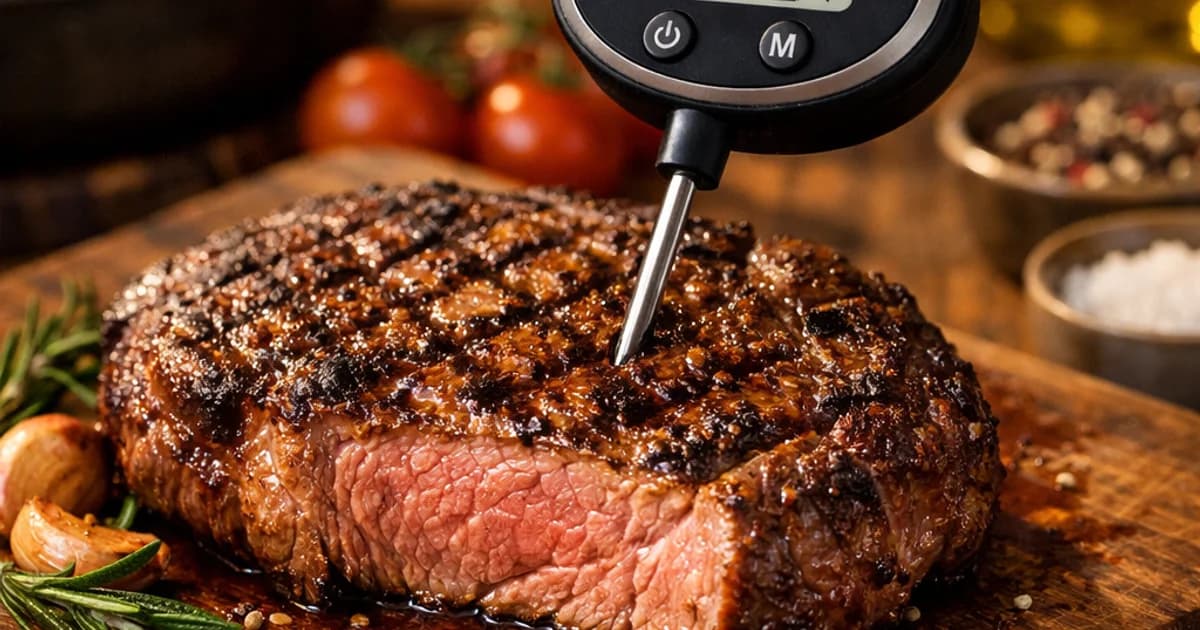
If you are cooking proteins and need to verify doneness accurately, the Meat Temperature Chart covers safe internal temperatures for every major protein, including the resting temperatures that matter for juicy results.
When adapting recipes for the air fryer also means adapting ingredients — whether because you are out of something or making a substitution for dietary reasons — the 50 Ingredient Substitutions guide has practical swap options for pantry staples, dairy, eggs, and more.
Free Tool
Cooking Time Converter
Convert cooking times between oven, air fryer, slow cooker, and more with our free tool.
Ready to simplify your meal planning?
Join UseMealPlanner and get AI-generated recipes tailored to your preferences, dietary needs, and schedule.
Download the App