The Complete Freezer Meal Prep Guide: Cook Once, Eat for Weeks
A comprehensive freezer meal prep guide covering what freezes well, proper storage techniques, thawing methods, and 10 of the best freezer-friendly meals to batch cook.
The concept behind freezer meal prep is simple: spend a few hours cooking on one day, and eat home-cooked meals for weeks afterward with almost no daily effort. Instead of cooking from scratch every night, you pull a container from the freezer, reheat it, and sit down to a meal that tastes like you spent 45 minutes in the kitchen.
This is not the same as buying frozen dinners from the grocery store. Those tend to be small, expensive, and nutritionally questionable. Freezer meal prep means cooking your own recipes, in your own kitchen, with ingredients you chose, and then preserving them at their peak quality so future-you eats just as well as present-you.
The approach works for anyone, but it is especially powerful for working parents who face the nightly "what is for dinner" crisis, for people who want to eat well but lack the motivation to cook daily, and for anyone trying to reduce their food spending by eliminating takeout on the nights when cooking feels impossible.
This guide covers everything: what freezes well and what does not, proper storage techniques that prevent freezer burn, the best thawing methods for safety and quality, and 10 freezer-friendly meals that are worth batch cooking.
Why Freezer Meal Prep Works
The Time Investment Pays Compound Returns
A typical weeknight dinner takes 30 to 45 minutes of active cooking time, plus planning, plus shopping, plus cleanup. That is roughly 3.5 to 5 hours per week spent on dinner alone. A freezer meal prep session of 3 to 4 hours on a single weekend day can produce 10 to 15 meals, effectively covering two to three weeks of dinners.
The math is stark: 3 hours once versus 3 to 5 hours every week. Over a month, freezer meal prep saves you 9 to 17 hours. Over a year, that is the equivalent of a full work week you get back.
It Eliminates the Decision Problem
Deciding what to eat is harder than cooking it. By the time you finish a workday, pick up the kids, and walk through the door, your capacity for decisions is depleted. Freezer meal prep moves the decision to the weekend when you have energy and mental bandwidth. On a Tuesday night, you are not deciding what to cook. You are deciding which fully prepared meal to pull from the freezer. That is a two-second choice, not a twenty-minute ordeal.
It Cuts Food Waste and Spending
When you freeze meals immediately after cooking, nothing spoils. There is no half-used bag of spinach rotting in the crisper drawer, no leftover chicken drying out in the back of the fridge. You cook it, freeze it, and it stays exactly as good as the moment it went in. Families who adopt freezer meal prep consistently report spending 25 to 40 percent less on food, primarily because they stop ordering takeout on exhausted weeknights.
For a detailed breakdown of how to combine freezer prep with weekly meal planning, our guide on easy meal prep for working parents covers a complementary Sunday strategy that pairs well with freezer cooking.
Ready to simplify your meal planning?
Join UseMealPlanner and get AI-generated recipes tailored to your preferences, dietary needs, and schedule.
Download the AppWhat Freezes Well (and What Does Not)
Not everything survives the freezer equally. Understanding what works and what does not saves you from the disappointment of thawing a container and finding mush.
Foods That Freeze Exceptionally Well
Soups and stews. These are the gold standard of freezer meals. The liquid protects the ingredients from freezer burn, and flavors actually improve after freezing because they continue to meld. Chili, minestrone, chicken tortilla soup, beef stew, and lentil soup all freeze beautifully for three to four months.
Cooked grains. Rice, quinoa, farro, and barley all freeze perfectly. Portion them into individual servings, and you have a side dish ready in two minutes of microwaving. The key is to freeze them while still slightly moist. Add a tablespoon of water to each portion before sealing.
Casseroles and baked pasta. Lasagna, baked ziti, enchiladas, and chicken pot pie all hold up extraordinarily well. You can freeze them either before or after baking. Freezing before baking means you go straight from freezer to oven with no thawing step. Freezing after baking means faster reheating.
Meatballs and cooked proteins. Cooked chicken (shredded or sliced), ground beef, pulled pork, and meatballs all freeze for two to three months without quality loss. Freeze meatballs on a sheet pan first so they do not clump together, then transfer to a bag once solid.
Sauces. Marinara, bolognese, curry sauce, and pesto all freeze well. Use ice cube trays for small portions or small containers for meal-sized amounts. Frozen sauce cubes are incredibly versatile since you can defrost exactly what you need.
Burritos and wraps. Assembled burritos wrapped individually in foil freeze for up to three months. Reheat in the oven for a crispy exterior or microwave for speed.
Bread, dough, and baked goods. Bread, pizza dough, cookie dough, muffins, pancakes, and waffles all freeze excellently. Bread toasts directly from frozen. Cookie dough can be baked from frozen with just a minute or two added to the baking time.
Foods That Freeze Poorly
Raw high-water vegetables (cucumbers, lettuce, radishes, raw tomatoes) become mushy because water inside cells expands and ruptures cell walls. These same vegetables are fine if cooked first, like in a sauce or soup.
Dairy-heavy sauces separate or become grainy. The fix: freeze the dish without the dairy and stir in cream or cheese when reheating.
Fried foods lose all crispness. Reheat in an oven or air fryer rather than the microwave, but the texture never fully recovers.
Cooked eggs turn rubbery, except when baked into dishes like frittatas where surrounding ingredients buffer the texture change.
Mayonnaise-based salads break down completely. The emulsion separates, creating an oily, unpleasant texture.
Plain cooked pasta becomes mushy. Pasta frozen in sauce holds up much better because the sauce coats and protects the noodles.
Tip
When in doubt, freeze a small test portion first. If you are unsure whether a dish will survive freezing, freeze a single serving and thaw it a few days later. Five minutes of testing saves you from wasting an entire batch.
Proper Storage: Preventing Freezer Burn
Freezer burn is not a safety issue. It is a quality issue. Those dry, grayish-white patches on frozen food are areas where moisture has escaped from the food and sublimated into ice crystals on the surface. The food is still safe to eat, but the affected areas taste papery and stale.
Preventing freezer burn comes down to one principle: minimize the food's exposure to air.
Best Storage Options
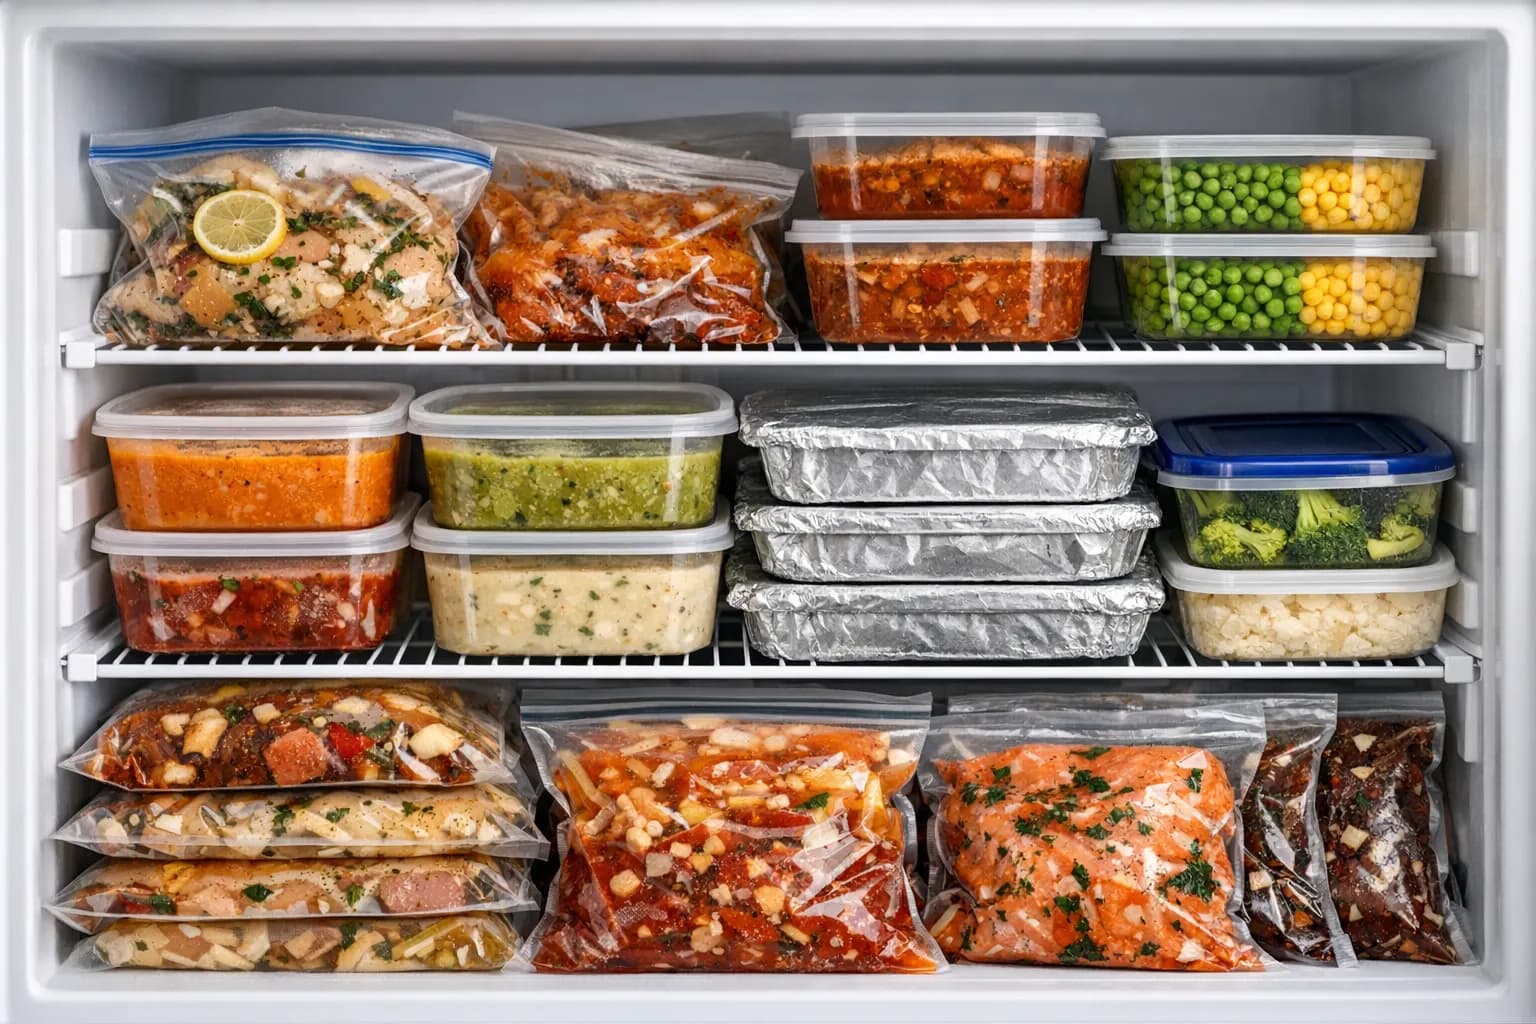
Freezer-safe zip-top bags are the most versatile option. Squeeze out all air, lay flat to freeze, then stack vertically like files. Rigid containers (glass or BPA-free plastic) with tight lids work well for soups and stews; leave half an inch of headspace for expansion. Foil and plastic wrap are best for individual items like burritos: plastic wrap against the food, foil over the top. A vacuum sealer extends freezer life by two to three times and is worth the investment if you freeze regularly.
Labeling and Organization
Label every container with the dish name and freeze date. Use masking tape and a permanent marker. Without labels, everything looks identical within a week.
Zone your freezer by category (proteins, complete meals, grains, sauces), eat the oldest items first, and keep a running inventory list on the freezer door so nothing gets buried and forgotten.
Thawing Methods: Safety and Quality
How you thaw frozen meals matters for both food safety and taste. The FDA identifies three safe methods.
Refrigerator thawing (best quality): Move the container to the fridge 24 hours before you plan to eat it. The food thaws evenly at a safe temperature, and stays safe for an additional one to two days, giving you flexibility on timing.
Cold water thawing (faster): Submerge the sealed bag in cold water, changing the water every 30 minutes. A one-pound portion thaws in about an hour. Cook or reheat immediately after thawing.
Microwave thawing (fastest): Use the defrost setting. Works well for soups and sauced dishes but poorly for large solid items like casseroles where edges overcook while the center stays frozen. Cook immediately after.
Never thaw on the counter. The outer layer reaches the bacterial danger zone (40 to 140 degrees) while the interior stays frozen. This is unsafe regardless of how many people do it.
When adjusting cook times for frozen versus thawed meals, especially when going straight from freezer to oven, our Cooking Time Converter tool helps you calculate the right timing so nothing comes out underdone or overdone.
Free Tool
Cooking Time Converter
Calculate adjusted cooking times for frozen meals going straight from freezer to oven.
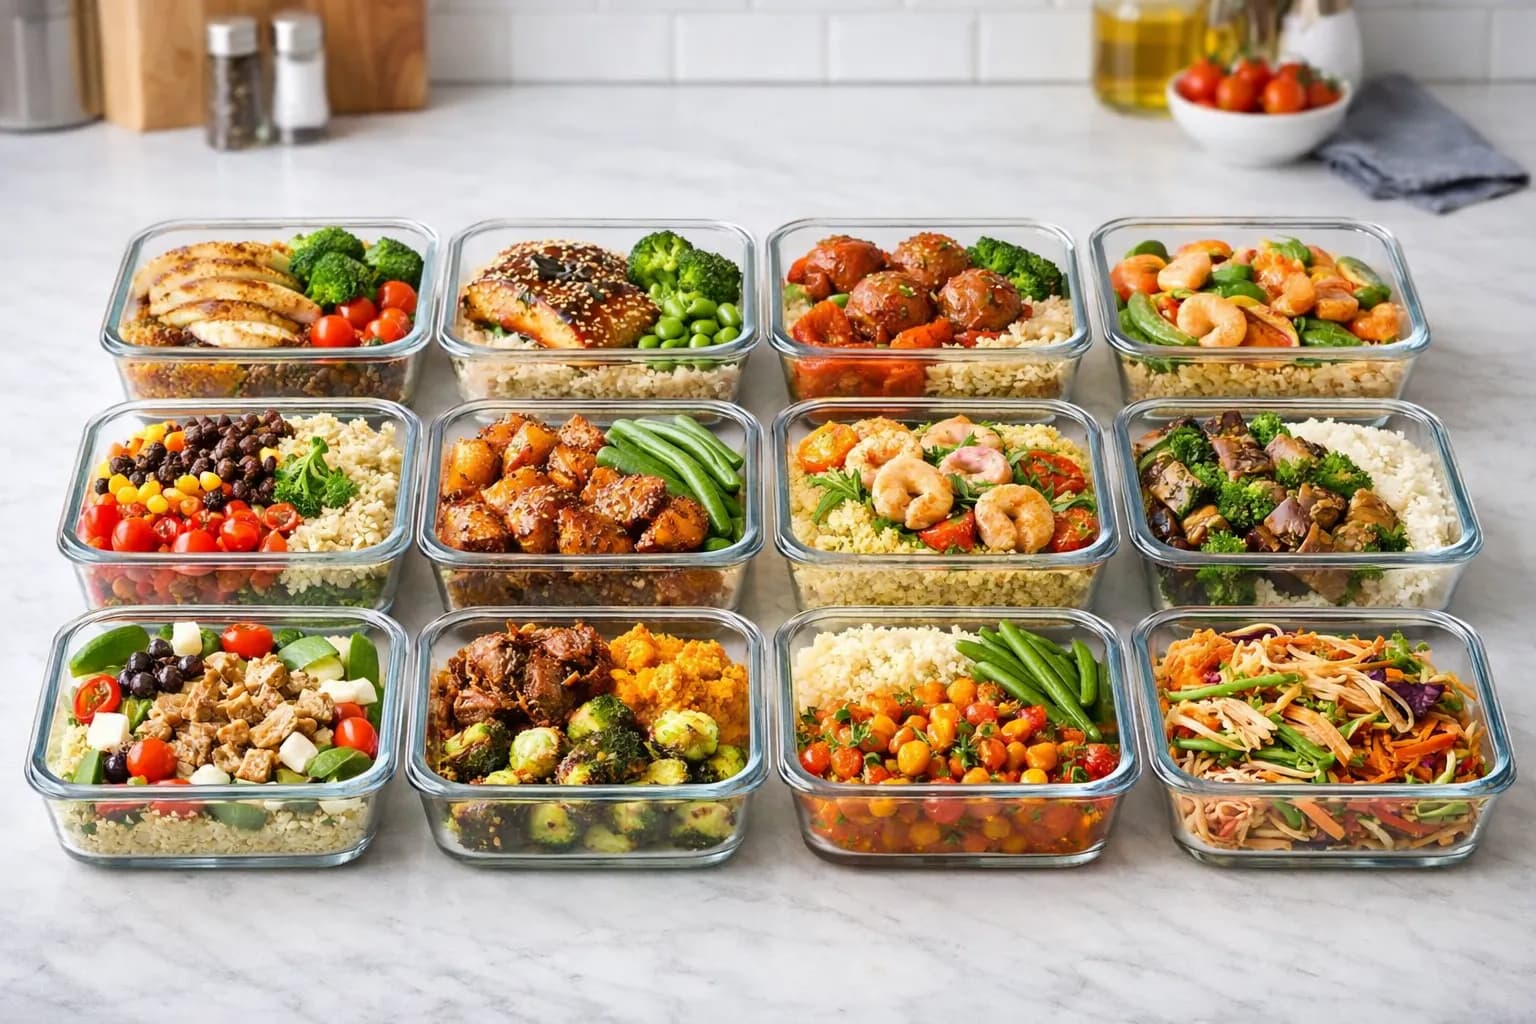
10 Best Freezer-Friendly Meals
These meals were selected because they freeze well, reheat without quality loss, and are practical to batch cook.
1. Classic Beef Chili (Freezes 4-6 months)
Ground beef, kidney beans, diced tomatoes, and spices. Chili actually tastes better after freezing because the flavors continue to develop. Makes 8 to 10 servings. Thaw overnight and heat on the stovetop for 10 to 15 minutes.
2. Chicken Tikka Masala (Freezes 3-4 months)
Chicken thighs in a tomato-cream sauce with garam masala, turmeric, and cumin. The sauce insulates the chicken and the spices intensify during storage. Makes 6 to 8 servings. Add a splash of cream when reheating to refresh the sauce.
3. Lasagna (Freezes 3 months)
The layered structure of pasta, sauce, and cheese protects each component. Freeze unbaked to go straight from freezer to oven: bake at 375 degrees, covered, for 60 minutes, then uncovered for 15 minutes. Makes 8 to 12 servings.
4. Black Bean and Sweet Potato Enchiladas (Freezes 3 months)
Sweet potato holds its texture through freezing better than regular potato. The tortilla, filling, and sauce form a unified package. Bake from frozen at 375 degrees, covered, for 40 to 50 minutes.
5. Meatballs in Marinara (Freezes 4 months)
Meatballs are dense and resist freezer burn. Freeze on a sheet pan first so they do not clump, then transfer to a bag. Drop frozen meatballs directly into heated marinara and simmer for 20 to 25 minutes.
6. Chicken Burrito Filling (Freezes 3-4 months)
Shredded chicken thighs with salsa, black beans, and cumin. Versatile enough for burritos, tacos, bowls, quesadillas, and nachos. Thaw overnight and heat in a skillet for 5 to 7 minutes.
7. Minestrone Soup (Freezes 4-6 months)
The broth base and hearty vegetables handle freezing excellently. The one rule: add pasta after thawing, not before freezing, to prevent mushiness. Reheat on the stovetop and serve with parmesan and crusty bread.
8. Shepherd's Pie (Freezes 3 months)
The mashed potato topping forms a protective seal over the meat and vegetable filling. Thaw overnight and bake at 375 degrees for 30 to 40 minutes until the filling bubbles and the topping browns.
9. Thai Coconut Curry (Freezes 3-4 months)
The fat in coconut milk protects the vegetables and protein during freezing. Add fresh basil and a squeeze of lime after reheating to brighten the flavors. Serve over rice.
10. Breakfast Burritos (Freezes 2-3 months)
The ultimate grab-and-go freezer meal. Wrap individually in foil. Microwave for 2 to 3 minutes, flipping halfway. For a crispier exterior, finish in a dry skillet for 1 minute per side.
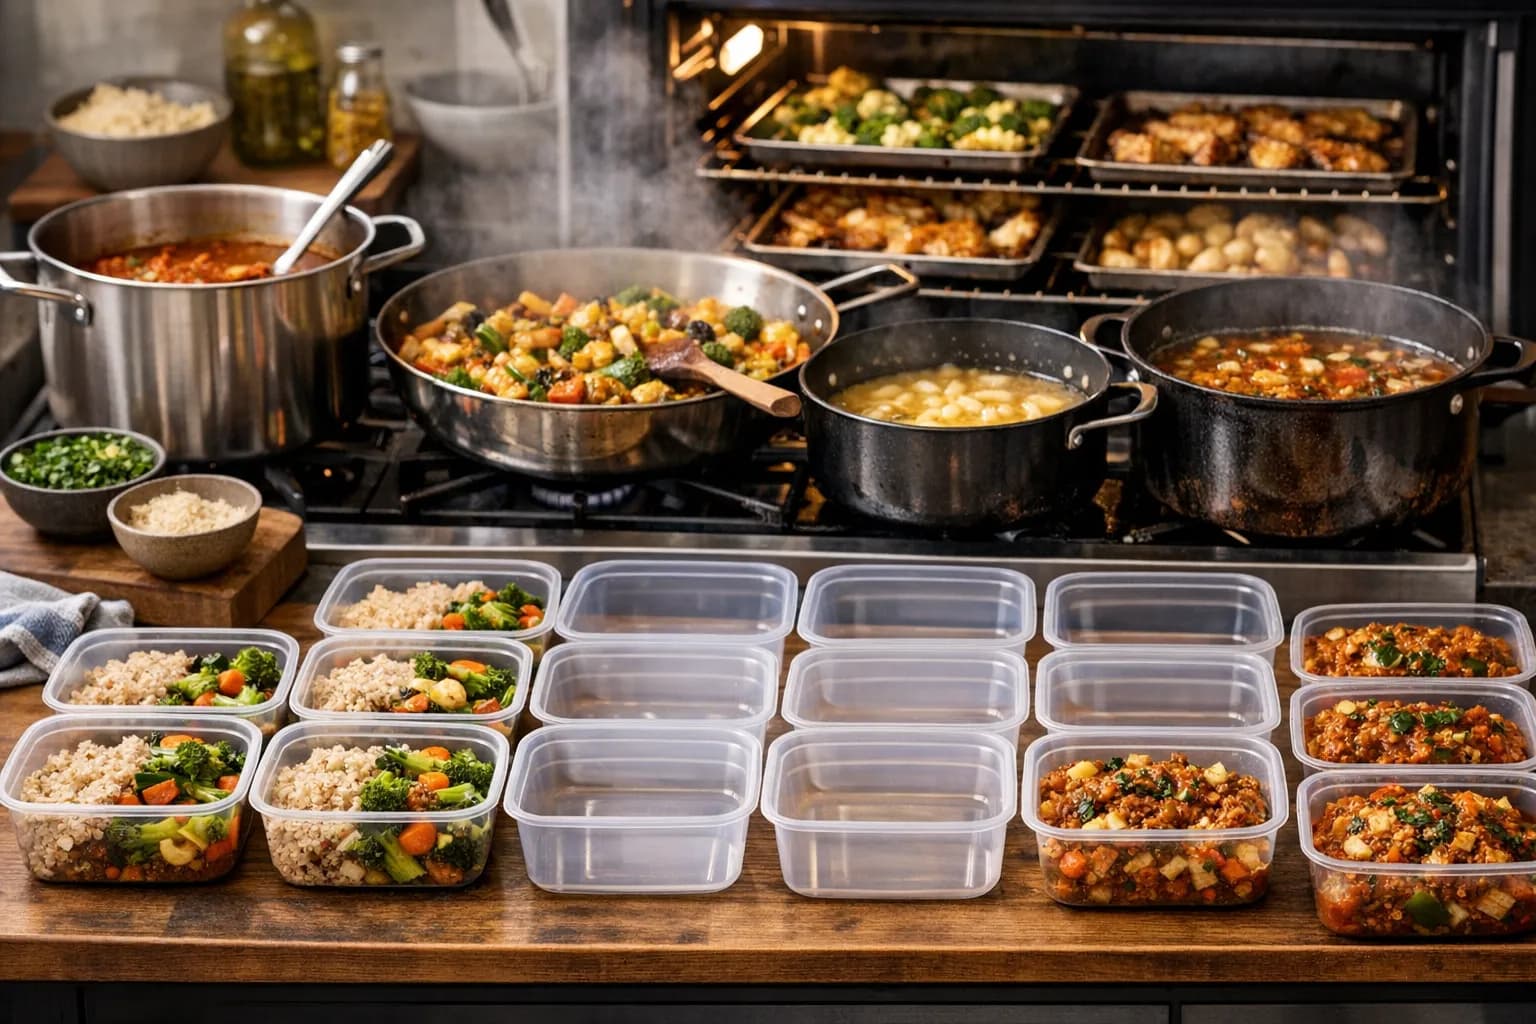
The Freezer Meal Prep Day: A Step-by-Step System
A productive session requires a plan. Without one, you spend half the day figuring out what to do next. Here is a system that produces 10 to 15 meals in 3 to 4 hours.
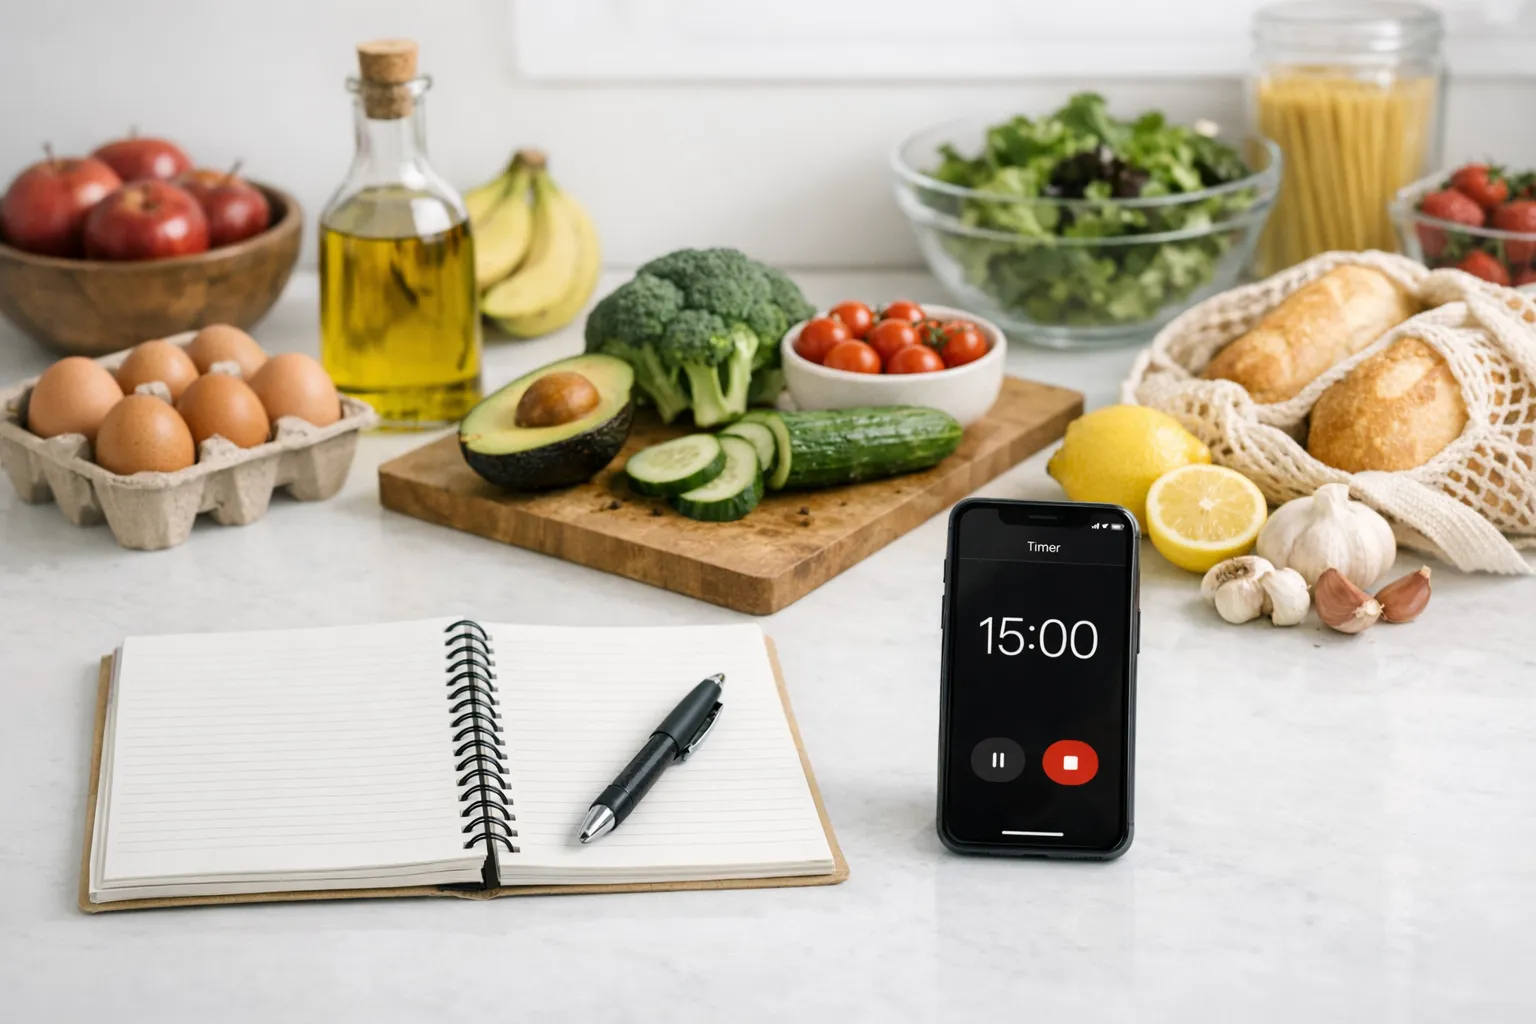
The week before: Choose 3 to 4 recipes. Write a consolidated grocery list that combines ingredients across all recipes. Check your freezer space and clear out anything old. Gather containers, bags, foil, and labels so everything is ready.
Hour 1 -- Prep everything. Do all chopping, measuring, and organizing before turning on a single burner. Start anything that runs unattended: slow cooker meals, large pots of chili, proteins that need to braise.
Hour 2 -- Cook and assemble. With everything prepped, work in parallel. A soup simmering on the stove, a casserole being assembled on the counter, meatballs baking in the oven, rice cooking on autopilot. While the meatballs bake, assemble the enchiladas. While the soup simmers, roll the burritos.
Hour 3 -- Cool, portion, and store. This is the step people rush through. Hot food cannot go directly into the freezer because it raises the temperature and partially thaws surrounding items. Cool food to room temperature first (use an ice bath in the sink for soups). Portion into meal-sized containers, remove as much air as possible, label everything with the dish name and date, and arrange by category.
Hour 4 -- Cleanup and inventory. Take a photo of your filled freezer. That photo becomes your menu for the next two to three weeks.
Tip
Double your most popular recipes. If your family always asks for chili or your kids devour the breakfast burritos, make a double batch of those and a single batch of everything else.
Reheating for Best Quality
The difference between a mediocre reheated meal and one that tastes freshly cooked often comes down to technique.
- Oven (best for casseroles and baked dishes): Cover with foil, bake at 350 to 375 degrees for 25 to 40 minutes thawed or 50 to 70 minutes frozen. Uncover for the last 10 minutes for browning.
- Stovetop (best for soups, stews, and sauces): Heat over medium, stirring occasionally. Add a splash of water or broth if the dish has thickened.
- Microwave (best for speed): Use medium power (50 to 70 percent) rather than full power to avoid hot spots. Stir halfway through and cover with a damp paper towel.
After reheating, refresh the meal with a finishing touch: a squeeze of lime juice, a sprinkle of fresh herbs, a drizzle of good olive oil, or a handful of crushed tortilla chips for crunch. These small additions make reheated food taste freshly cooked rather than warmed over. If the original recipe included cream or cheese, add it during reheating rather than before freezing for significantly better texture.
Building Freezer Meals Into Your Routine
If a full prep day feels overwhelming, start with the double-batch method: every time you cook dinner, make twice as much and freeze the extra half. Within two weeks, you have 7 to 10 freezer meals without ever dedicating a full day to prep.
Once you are comfortable, try a monthly mega session. Spend 4 to 5 hours on a Saturday, produce 15 to 25 meals, and barely cook for the next three to four weeks. Or combine both approaches: a monthly session for your base supply, supplemented by double batches during the week.
For help generating new freezer-friendly recipe ideas tailored to your family's preferences, UseMealPlanner creates personalized meal plans that you can batch cook and freeze.
Key Takeaway
Freezer meal prep is the most efficient cooking strategy available: 3 to 4 hours of weekend work replaces 15 to 20 hours of weeknight cooking over the following weeks. Focus on the meals that freeze best (soups, stews, casseroles, sauced proteins, and burritos), store them properly to prevent freezer burn (remove air, use appropriate containers, label everything), and thaw safely in the refrigerator or cold water. Start with the double-batch method if a full prep day feels overwhelming: just make twice as much of tonight's dinner and freeze the extra half.